Hello readers, I’m no longer posting new content on gafferongames.com
Please check out my new blog at mas-bandwidth.com!
Introduction
Hi, I’m Glenn Fiedler. Welcome to Virtual Go, my project to create a physically accurate computer simulation of a Go board and stones.
In previous articles we mathematically defined the shape of a go stone and tessellated its shape so it can be drawn with 3D graphics hardware.
Now we want to make the go stone move, obeying Newton’s laws of motion so the simulation is physically accurate. The stone should be accelerated by gravity and fall downwards. I also want the stone to rotate so it tumbles as it falls through the air.
The Rigid Body Assumption
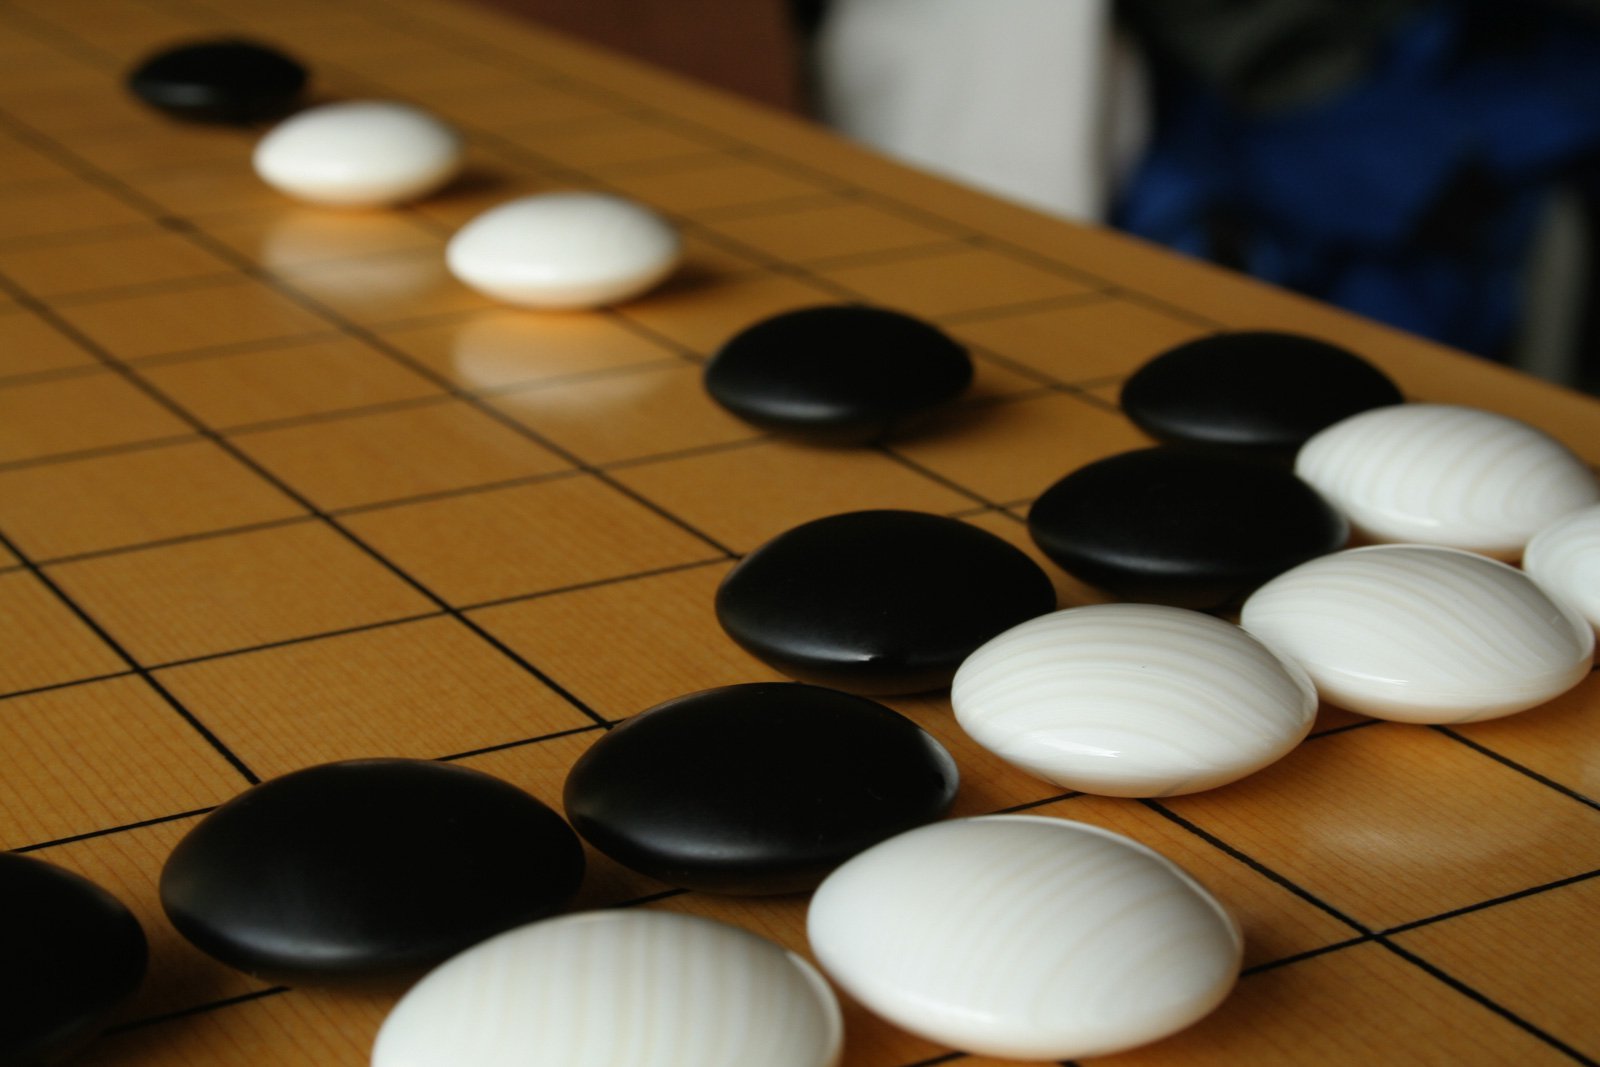
Try biting down on a go stone and you’ll agree: go stones are very, very hard.

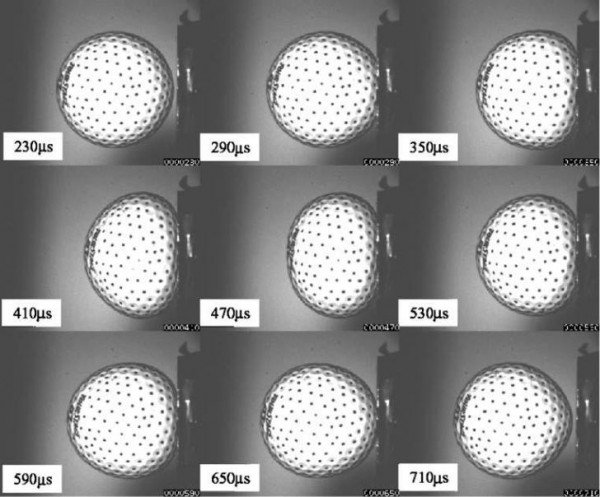
Golf balls are pretty hard too, but if you look at a golf ball being hit by a club in super-slow motion, you’ll see that it deforms considerably during impact.

The same thing happens to all objects in the real world to some degree. Nothing is truly rigid. No real material is so hard that it never deforms.
But this is not the real world. This is Virtual Go :) It’s a simulation and here we are free to make whatever assumptions we want. And the smartest simplification we can make at this point is to assume that the go stone is perfectly rigid and does not deform under any circumstance.
This is known as the rigid body assumption.
Working in Three Dimensions
Because the go stones are rigid, all we need to represent their current position is the position of the center. As the center moves, so does the rest of the stone.
We’ll represent this position using a three dimensional vector P.
Let’s define the axes so we know what the x,y,z components of P mean:
- Positive x is to the right
- Positive y is up
- Positive z is into the screen
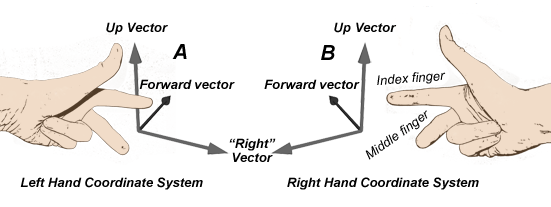
This is what is known as a left-handed coordinate system. So called because I can use the fingers on my left hand to point out each positive axis direction without breaking them.

I’ve chosen a left-handed coordinate system purely on personal preference. Also, I’m left-handed and I like my fingers :)
Linear Motion
Now we want to make the stone move.
To do this we need the concept of velocity. Velocity is also a vector but it’s not a point like P. Think of it more like a direction and a length. The direction of the velocity vector is the direction the stone is moving and the length is the speed it’s moving in some unit per-second. Here I’ll use centimeters per-second because go stones are small.
For example, if we the stone to move to the right at a rate of 5 centimeters per-second then the velocity vector is (5,0,0).
To make the stone move, all we have to do is add the velocity to the position once per-second:
While this works, it’s not particularly exciting. We’d like the stone to move much more smoothly. Instead of updating once per-second, let’s update 60 times per-second or 60 fps (frames per-second). Rather than taking one big step, we’ll take 60 smaller steps per-second, each step being 1/60 of the velocity.
You can generalize this to any framerate with the concept of delta time or “dt”. To calculate delta time invert frames per second: dt = 1/fps and you have the amount of time per-frame in seconds. Next, multiply velocity by delta time and you have the change in position per-frame.
    const float fps = 60.0f;
    const float dt = 1 / fps;
    while ( !quit )
    {
        stone.rigidBody.position += stone.rigidBody.velocity * dt;
        RenderStone( stone );
        UpdateDisplay();
    }
This is actually a very simple type of numerical integration.
Gravitational Acceleration
Next we want to add gravity.
To do this we need to change velocity each frame by some amount downwards due to gravity. Change in velocity is known as acceleration. Gravity provides a constant acceleration of 9.8 meters per-second, per-second, or in our case, 98 centimeters per-second, per-second because we’re working in centimeters.
Acceleration due to gravity is also a vector. Since gravity pulls objects down, the acceleration vector is (0,-98,0). Remember, +y axis is up, so -y is down.
So how much does gravity accelerate the go stone in 1/60th of a second? Well, 98 * 1/60 = 1.633… Hey wait. This is exactly what we did with velocity to get position!
Yes it is. It’s exactly the same. Acceleration integrates to velocity just like velocity integrates to position. And both are multiplied by dt to find the amount to add per-frame, where dt = 1/fps.
Here’s the code:
    float gravity = 9.8f * 10;
    float fps = 60.0f;
    float dt = 1 / fps;
    while ( !quit )
    {
        stone.rigidBody.velocity += vec3f( 0, -gravity, 0 ) * dt;
        stone.rigidBody.position += stone.rigidBody.velocity * dt;
        RenderStone( stone );
        UpdateDisplay();
    }
And here’s the result:
As you can see, now that we’ve added acceleration due to gravity the go stone moves in a parabola just like it does in the real world when it’s thrown.
Angular Motion
Now let’s make the stone rotate!
First we have to define how we represent the orientation of the stone. For this we’ll use a quaternion.
Next we need the angular equivalent of velocity known as… wait for it… angular velocity. This too is a vector aka a direction and a length. It’s direction is the axis of rotation and the length is the rate of rotation in radians per-second. One full rotation is 2pi radians or 360 degrees so if the length of the angular velocity vector is 2pi the object rotates around the axis once per-second.
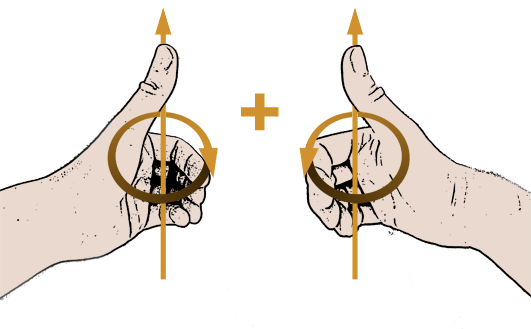
Because we’re using a left handed coordinate system the direction of rotation is clockwise about the positive axis. You can remember this by sticking your thumb of your left hand in the direction of the axis of rotation and curling your fingers. The direction your fingers curl is the direction of rotation. Notice if you do the same thing with your right hand the rotation is the other way.

How do we integrate orientation from angular velocity? Orientation is a quaternion and angular velocity is a vector. We can’t just add them together.
The solution requires a reasonably solid understanding of quaternion math and how it relates to complex numbers. Long story short, we need to convert our angular velocity into a quaternion form and then we can integrate that just like we integrate any other vector. For a full derivation of this result please refer to this excellent article.
Here is the code I use to convert angular velocity into quaternion form:
    inline quat4f AngularVelocityToSpin( quat4f orientation, vec3f angularVelocity )
    {
        const float x = angularVelocity.x();
        const float y = angularVelocity.y();
        const float z = angularVelocity.z();
        return 0.5f * quat4f( 0, x, y, z ) *
            orientation;
    }
And once I have this spin quaternion, I can integrate it to find the change in the orientation quaternion just like any other vector.
    const float fps = 60.0f;
    const float dt = 1 / fps;
    while ( !quit )
    {
        quat4f spin = AngularVelocityToSpin(
            stone.rigidBody.orientation,
            stone.rigidBody.angularVelocity );
        stone.rigidBody.orientation += spin * iteration_dt;
        stone.rigidBody.orientation = normalize( stone.rigidBody.orientation );
        RenderStone( stone );
        UpdateDisplay();
    }
The only difference is that after integration I renormalize the quaternion to ensure it doesn’t drift from unit length, otherwise it stops representing a rotation.
Yep. That go stone is definitely rotating.
Why Quaternions?
Graphics cards typically represent rotations with matrices, so why are we using quaternions when calculating physics instead of 4x4 matrices? Aren’t we bucking the trend a bit here?
Not really. There are many good reasons to work with quaternions:
-
It’s easier to integrate angular velocity using a quaternion than a 3x3 matrix
-
Normalizing a quaternion is faster than orthonormalizing a 3x3 matrix
-
It’s really easy to interpolate between two quaternions
We’ll still use matrices but as a secondary quantity. This means that each frame after we integrate we convert the quaternion into a 3x3 rotation matrix and combine it with the position into a 4x4 rigid body matrix and its inverse like this:
    mat4f RigidBodyMatrix( vec3f position,
                           quat4f rotation )
    {
        mat4f matrix;
        rotation.toMatrix( matrix );
        matrix.value.w = simd4f_create( position.x(),
                                        position.y(),
                                        position.z(),
                                        1 );
        return matrix;
    }

    mat4f RigidBodyInverse( const mat4f & matrix )
    {
        mat4f inverse = matrix;
        vec4f translation = matrix.value.w;
        inverse.value.w = simd4f_create(0,0,0,1);
        simd4x4f_transpose_inplace( &inverse.value );
        vec4f x = matrix.value.x;
        vec4f y = matrix.value.y;
        vec4f z = matrix.value.z;
        inverse.value.w =
            simd4f_create( -dot( x, translation ),
                           -dot( y, translation ),
                           -dot( z, translation ),
                           1.0f );
        return inverse;
    }
Now whenever we transform vectors want to go in/out of stone body space we’ll use this matrix and its inverse. It’s the best of both worlds.
Bringing It All Together
The best thing about rigid body motion is that you can calculate linear and angular motion separately and combine them together and it just works.
Here’s the final code with linear and angular motion combined:
const float gravity = 9.8f * 10;
const float fps = 60.0f;
const float dt = 1 / fps;

while ( !quit )
{
    stone.rigidBody.velocity += vec3f( 0, -gravity, 0 ) * dt;

    stone.rigidBody.position += stone.rigidBody.velocity * dt;

    quat4f spin =
        AngularVelocityToSpin(
            stone.rigidBody.orientation,
            stone.rigidBody.angularVelocity );

    stone.rigidBody.orientation += spin * dt;
    stone.rigidBody.orientation = normalize( stone.rigidBody.orientation );

    RenderStone( stone );

    UpdateDisplay();
}
And here is the end result:
I think this is fairly convincing. The go stone is moving quite realistically!
NEXT ARTICLE: Go Stone vs. Go Board
Hello readers, I’m no longer posting new content on gafferongames.com